Thursday, September 21, 2017

How To Draw A Book Template

Good morning crafters!

It`s been awhile since my last post since i`ve been busy getting tons more craft posts ready, along with working on a little extra surprise.

A few days ago I finish this new picture tutorial on how to draw your own mini book template! I`ll be giving a full tutorial on how to make a finished book soon!


I hope you like it! Do you like tutorials? Let us know in the comments!


Until next time, keep crafting!💖💖💖💖💖💖

Monday, September 11, 2017

TIny Carrots!

Good morning (or more like middle of the night) crafters!

Recently I tried making some super mini carrots. They surprisingly turned out well and are close to 1:48 scale size. 

It was pretty easy to make, I just used orange clay to make small triangles and used green clay to make the grass/green leaves, I also textured it using a toothpick.

I hope you like them!

Sunday, September 10, 2017

Making My Leopard & Habitat

Good morning crafters!

A few days ago I found some extra photos I took a months ago of creating my little leopard & habitat. Although I created it back in May, it`s never too late to share some tips! So, i`ve decided to give a more in-depth post on how & what I used to create my little adorable clay leopard, and her habitat

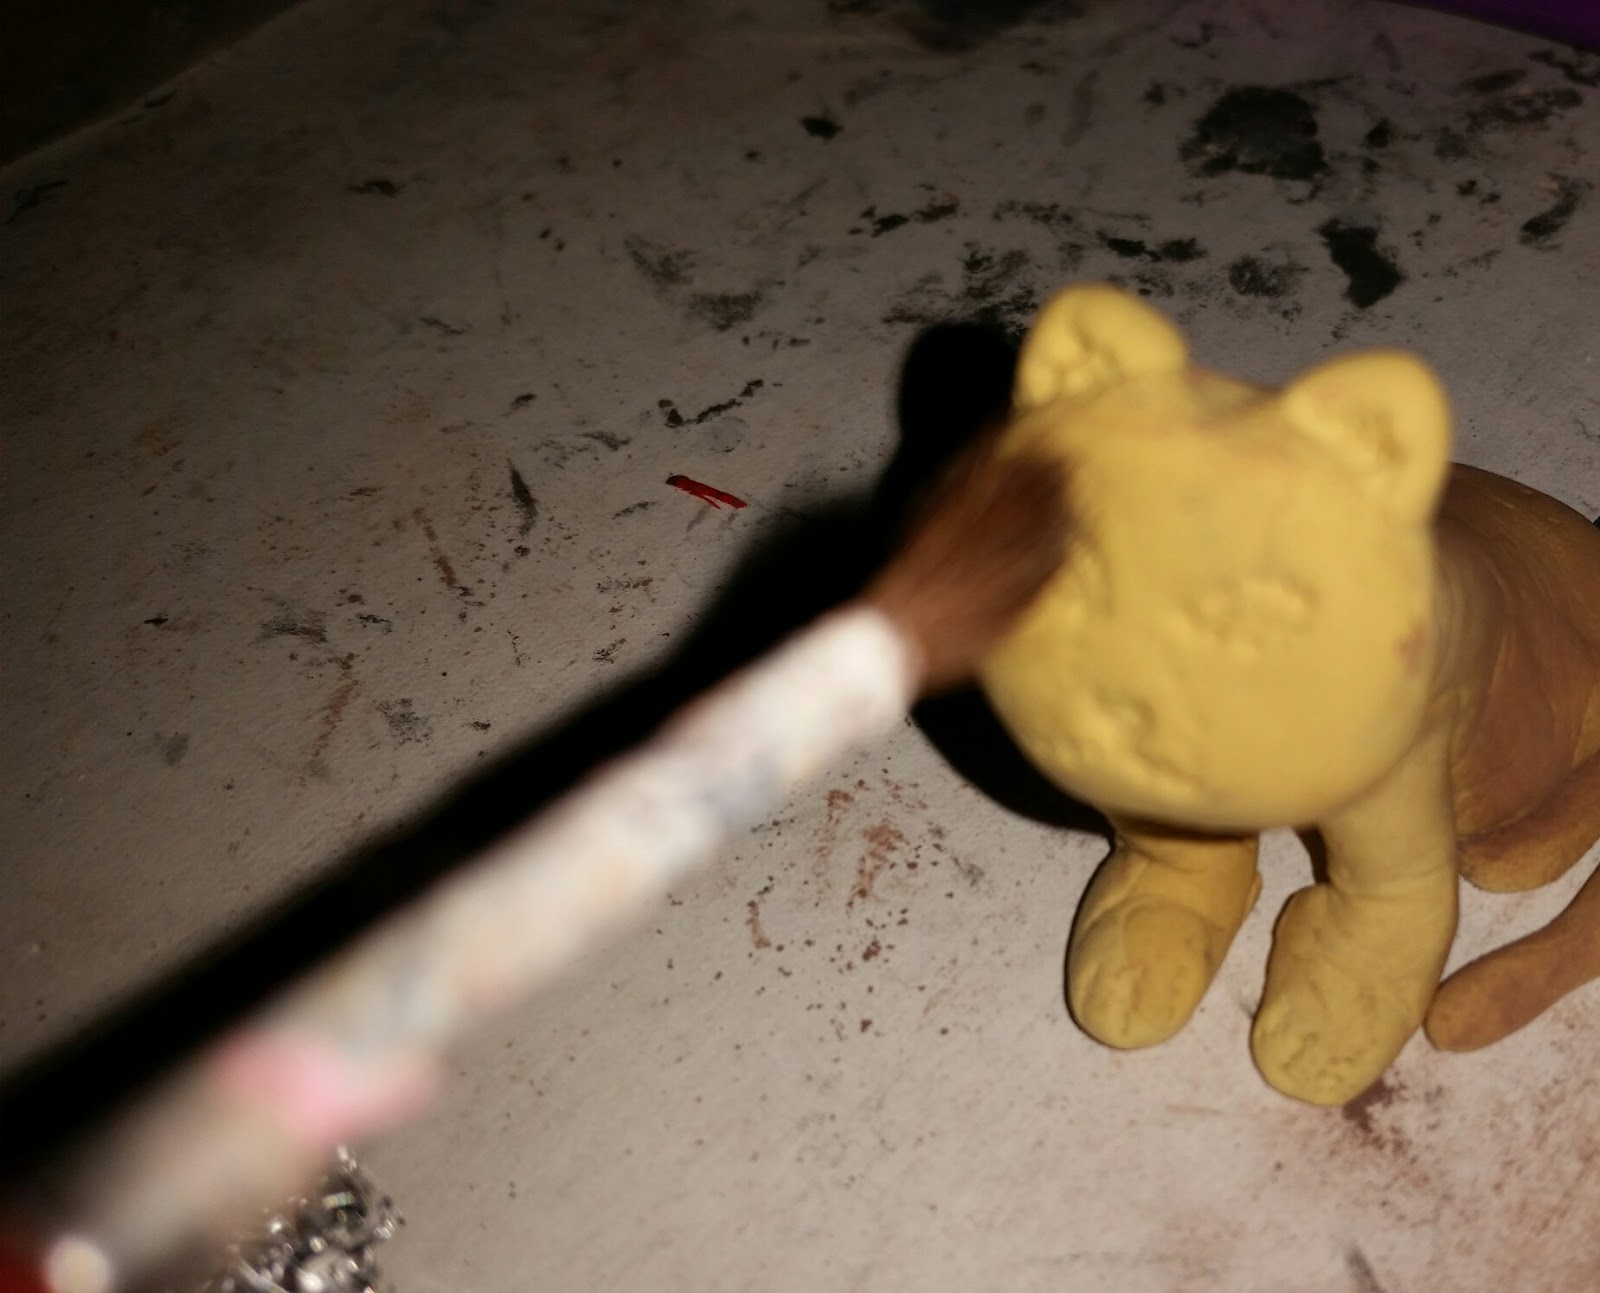
I started off creating the leopard. First, I shaped her body and then her legs. and her face. I made partial triangle shapes to create her ears. When I finished with shaping her, I used a toothpick to give a claw-like shape in her paws. Next, I used a toothpick to make marks in her ears, eyes, nose and mouth so I would know exactly where to paint the  face. Then, I dusted her with brown chalk to give her a darker more leopard-like color.


A few hours later I finished coloring her and painting her. I used black sun catcher paint for the eyes, ears and mouth. Next, I gave her an adorable pink clay button nose! Then, I added her spots with black sun catcher paint. Although her spots are more like a cheetah than leopard, all leopards have different spots!


Onto the next part! I decided she must have a habitat to live in, so I had no choice but to make one for her! To start creating the grass, I used dark green clay and flattened it out. Then, I used a sheet of rough sand paper to press onto the green clay. Sand paper gives a really good grass texture. It also works for giving a good sand texture.


Few more hours later, I finished the rest of the habitat. I used my fingers to shape the dirt, lake, and rock care. Then, I  got a ball of dark brown clay and made a mini log stick. After that, I used toothpicks and a needle tool to texture the log. Finally, last but not at all least, I dusted the dirt looking clay with light brown chalk, and also dusted the small rock cave with white chalk.


I hope you like it! Looking for the original post? Click HERE!

Popcorn!

Good evening crafters!

If any dolls feel like relaxing, watching a movie and having a snack, then we have the perfect snack for all of you! What is it? It`s Popcorn!

How I made it:
It was super fun! First, I started off by getting a white piece of clay and shaping it to look like a popcorn container. Next, I rolled many small balls of light yellow clay, Then, I then attached all the popcorn balls together and added them to the top of the container I created. Finally, I used sun catcher paint to give the container some pretty red stripes. I also used black sun catcher paint to add a little symbol!

It is very tiny so it`s perfect for popcorn for 1:12 scale dolls! I hope you like it! 

Friday, September 8, 2017

My First Pumpkin!

Good afternoon crafters!

Today i`m super excited to show a pumpkin I recently made. It came out pretty good for my first pumpkin i`ve made,

How I made it:
First, I made the pumpkin orange colored clay by mixing a bit of orange clay with a  touch of green to make an orangey brown. Next, I rolled it into a ball and kept rolling it until it became the shape I wanted. I made the stem by mixing orange, green, and a small touch of black. Finally, I just textured the stem using a toothpick. The pumpkin is fully grown, ready to eat & finished!

I hope you like it!


Thursday, September 7, 2017

Eiffel Tower Charm

Good morning crafters! I can`t wait to show one of my new mini charms I recently created! Since I can`t wait, here it is!

It was pretty easy. I created it using purple air-dry clay in an eiffel tower mold. When it was dry I used a purple marker to draw on the purple background. Then, I painted the eiffel tower part with some black Puffy Paint. Finally, I used Gold Metallic Puffy Paint in the middle and on the sides to give it a pretty & standing out effect. I also used a toothpick to make the hole at the top. It`s a perfect charm for a necklace, bracelet, or keychain!

I hope you like it!

Wednesday, September 6, 2017

Watermelon Charm

Watermelons are so delicious i decided I just had to make a mini one for myself!

A few days ago I started working on this adorable slice of watermelon charm! It was so much fun to make & didn`t take too long.

What I used: 
Red, green, and black clay
A toothpick

How I made it:
First, I started off using red clay to make a triangle for the inside of the watermelon. Next, I got a small strip of green clay and added it to one side of the red triangle for the watermelon rind. Then, I used black clay to make super small black balls, and pressed them on in inside of it for the seeds. And finally, I used a toothpick to make a hole in the top of the watermelon slice! The charm is perfectly finished!

Hope you like it!

Tuesday, September 5, 2017

Chocolate Chip Cookies!

Good morning crafters!

Today, i`m planning to share a delicious Chocolate Chip Cookie recipe! Though make sure to remember, it is only edible for dolls!

What you`ll need:

- Chocolate chips NOT edible, or known as brown clay
- Cookie dough NOT edible, can be known as beige clay

How I made it:

It was pretty easy. First, I mixed a touch of orange and white clay to make some beige clay, then rolled the beige clay into small balls. Next, I made some smaller balls using brown clay. Then, I added the smaller brown balls to the tops of the small beige balls. Finally, I slightly flattened the ball. Your chocolate chip cookies are finished!
My end result:


Hope your dolls enjoy them!