Friday, March 23, 2018

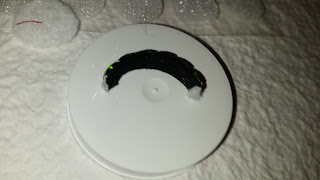
Miniature Clay Easter Scene Inside a Jar

Hello crafters! 

Although I haven't exactly completed many Easter crafts yet, I started working on this adorable Easter craft just a few weeks ago!

After seeing other amazing crafters make such adorable scenes inside of clear miniature jars, I decided to try one myself! I was originally planning to make a cute little fairy scene but instead decided to create an Easter scene. Considering the jar is just about 1 inch tall, it took hours of focused, steady work. 

First, I got green clay & used tweezers to stick it inside. Once it was in the jar, I used a needle tool to make it look like grass. Next, I got super small pieces of purple, pink, orange, and yellow clay rolled them into tiny Easter eggs and placed them inside the jar using my tweezers & needle. After that, I started working on the chocolate bunny! This was actually the first chocolate bunny that I've ever made in any size. To make it, I placed a small piece of flat brown clay on a flat board and used a toothpick to shape it. Took a while to get a bunny with a perfect look, shape, and size. Finally, I placed the chocolate bunny inside the jar!

For my first ever miniature scene inside a miniature jar, I think it turned out pretty well! What do you think?

I hope you like it!


Tuesday, March 13, 2018

Disney Descendants Evie Inspired Handsewn Pincushion

Hello crafters!

Since this weekend's challenge on the app, Crafty Amino was themed with royal crafts and royal includes not only good royals as in queens, kings, princesses, and princes, but also rotten-to-the-core royals, I decided to go with a Disney Descendants themed craft.  A little while after I came up with an idea for a theme to use, my sewing needle had accidentally dropped again.  Once searching & finding it another time, I figured that I definitely needed a new pincushion, small enough to fit with my sewing things, but big enough to stick my needle into.

 All of that is what finally brought me to the conclusion of making . . . . . . . . A Disney Descendants Evie Inspired Pincushion!  But wait!  You're probably wondering how Evie, Daughter of the Evil Queen, is royal?  Well technically, since her mom is a queen, evil or not, she would have to be a princess.
Here is how the pincushion turned out:

This was actually the first pin cushion that I've ever made so I'm really pleased with the result.  Luckily I took a few photos while making this pincushion which is what makes this a perfect craft to turn into a tutorial for any Descenders that would like to make their own!

Ready to start this tutorial?  Before you start, make sure to have these tools, which are listed below, nearby!

For this craft, you'll need:
- Sewing needle
- Scissors
- Gold thread
- Red felt

- Gold felt
- Stuffing


After I gathered all of my supplies, I started cutting out the pattern.  First, I cut out two crown shapes in the gold felt and two heart shapes in the red felt.


Next, I placed both red hearts neatly on each other, threaded my needle with gold thread, and started sewing.

Before I finished sewing the heart together, I stuffed it with stuffing.

Then, I finished sewing the heart together and started sewing the two crowns in the same way I sewed the heart.  I also sewed the top of one half of the heart to the crown.

 After that, I kept sewing the crown.  Took a little while to sew every point and edge.

 Finally, I stuffed the crown with stuffing and finished sewing the crown together.  This Evie inspired pincushion is finished!
I hope you liked this tutorial!

Sunday, March 11, 2018

Miniature Doll Velcro Bracelet (Tutorial

Hello crafters!

A few days ago I was trying to come up with a way to easily make a miniature bracelet for dolls without needing to glue, use clay, paint, or sew. I ended up making a super cute green emerald doll bracelet & I'm so excited to finally show you all how to make your own one!
Photo of the emerald bracelet.

Ready to start this super cool tutorial? First, here's what you'll need:
- A headband with jewels on it
- Scissors
- Velcro with sticky backings
- A doll (I used a Barbie doll)

Once you've gathered those three items, it's time to start making the bracelet! First, I wrapped part of the headband around my Barbie doll's wrist to get an idea of the size. I mainly just estimate sizes for the majority of my crafts, but if you're trying to get an exact size, I'd recommend using a tape measure.

Next, I cut off a small piece of the headband with about five and a half decorative gems on the piece.


After that, I cut up both pieces of velcro into small rectangles, basically the size & width of the end of the small headband piece. Stick one velcro piece to one side and the other piece to the other side of the cut off headband piece.


Finally, make sure the velcro is securely attached.


Your miniature doll bracelet is finished! Feel free to attach & detach the mini bracelet on your doll as much as you'd like!


I hope you liked this tutorial!

Friday, March 9, 2018

MIniature Alligator - Finished!

Hello crafters!

You might remember an adorable miniature alligator that I had posted a WIP post on earlier in February. Either way, I'm super excited to say, I finally finished it a few days after the original WIP post.

Haven't found the time to post it over the last few weeks, but I'm super excited to finally reveal this adorable alligator! And . . . . . . . here she is!
Pretty awesome, right? Not too many changes have been made since the WIP post, but there are many details when looking closely at it.

For the scales of the alligator, I used a few different markers with a few different shades of green, along with green sun catcher paints to give the alligator more of a realistic look. Next, I used white & black Puffy Paint to lightly color the eyes. Then, I used some white Puffy Paint to paint the alligator's sharp teeth. Finally, I used a toothpick with green sun catcher to fix any extra mistakes.

Well, I hope you like this adorable alligator!


Miniature French Fries Made With Scrap Clay (Tutorial)

Hello crafters!

Normally, whenever I'm trying to make miniature french fries, I use a light yellow clay color and shape out each individual french fry. Due to not being able to work with clay for the past few days, I came up with a much quicker, easier way to make miniature french fries. Surprisingly, I actually like these french fries a little better than my normal ones. 

In this craft, I'm using scrap clay to make the mini french fries. If and when you have worked with air-dry clay for a few months, a few scrap pieces of clay that have accidentally dried might start to accumulate.  As a tip for any other crafters reading this, never throw anything away. Scrap pieces of clay, plastic containers, scrap pieces of fabric, paper with writing on part of it, etc. All types of things can amazingly be used to make cool, new things.

So after a long intro, it's finally time for the tutorial part of this post!

HOW TO MAKE MINIATURE FRENCH FRIES:

What You'll Need:
- Yellow french fry colored piece of scrap clay
- Scissors

First, I cut off two small rectangle-shaped pieces of clay.

Next, I vertically sliced both pieces in half, now turning the two slices of clay into four slices of clay.


After that, I horizontally cut all four of the pieces in half. Once I finished doing this, there were now eight small slices of clay, also known as eight adorable mini fries.


Finally, I glued the mini fries together on a miniature plate. I added some ketchup, mustard, and a hot dog in a bun on the side! 

I hope you liked this tutorial!

Thursday, March 8, 2018

Working On A New Mini Cake . . . With My Eyes Closed!

Hello crafters!

Haven't posted in a few days due to being super busy making new miniature items & preparing them to be listed in my Ebay shop. But, I'm finally back!

Today I'm actually just about to work on another miniature cake. This time though, it's a bit different. After seeing a Truth or Dare crafting challenge on the app, Crafty Amino, I decided I just had to try some of the dares!

One of the dares were to try crafting something with your eyes closed, so that's exactly what I'm about to try! I'm planning to make a delicious dark chocolate cake with chocolate frosting and a strawberry on top! Just got together my paints, decorations, and a white cake to color.

A bit nervous, but super excited to see how long it will take me to accomplish this challenge with a perfectly pretty miniature cake. Hoping it comes out well!

Check back later for an update of how the finished cake turned out!


Sunday, March 4, 2018

Dollhouse Miniature S'mores inspired Cake

Hello crafters!

"Ahh, a nice summer evening at the beach! So relaxing, but a sweet treat would just make it so much better!" said Barbie.  If that's what your dolls are also thinking, don't fear! Sweets are finally here!

Lately, I've been working on a variety of new cakes & have been trying to see how unusual, while still realistic, I can make them. Whenever I saw this weekend's challenge, Beach Crafts on the app, Crafty Amino, it looked so fun that I just had to try making a cake inspired by the beach!

After hours of thinking, I thought of the perfect idea! A campfire at the beach inspired cake. Which is what brought me to making a delicious miniature s'mores cake!

Inside the cake are 3 layers of graham cracker and 3 layers of chocolate. Next, we go to the outside of the cake where there is some delicious chocolate marshmallow frosting. Finally, to top it all off, I added 4 pieces of a broken up s'more on top with a few marshmallow sprinkles! Or, if we translate this into craft language . . .

To make the cake, I used white air-dry clay. Recently I made a large batch of plain white cakes so whenever I have time, I could decorate them. To get the colors, I used black, yellow, white, orange, and red Puffy paint along with white simulation cream. Once I had mixed the colors perfectly to get a graham-cracker-beige color, melted-marshmallow-white color, and a chocolate-brown color, I started painting the cake. I painted the inside layers to look like graham cracker & chocolate. Next, I used a toothpick to frost the cake with chocolate icing. I slightly swirled a bit of the graham cracker color and white marshmallow paint on areas of the frosting to make it look like a chocolate marshmallow frosting. Finally, I used an extra s'more which I had made a while ago, broke it into four different pieces, and placed the pieces on the cake. I also broke up a few pieces of white clay and sprinkled it on the top to look like marshmallow sprinkles.

Voila! A perfect sweet treat for a campfire at the beach! I hope you like it!


Saturday, March 3, 2018

WIP Descendants 2 Evie Cotillion Dress Inspired Doll Dress

Hello crafters!

Last night I started working on another craft project & I'm so excited to post a few pictures of how it looks so far!

At the moment, I'm working on a beautiful doll dress inspired by Evie's Cotillion dress in the Disney movie, Descendants 2. Not even close to finishing it yet, but it seems to be coming out pretty good.

So far, the hardest part has been trimming the fabric into the perfect shape, size, and look. I actually just finished sewing the velcro onto the back of the dress last night. Though, since different dolls can be different sizes, I decided to try a new technique to easily adjust the size of the dress for mostly any doll at any time. For this technique, I basically sewed both sides together but left about an inch length of thread between both sides. After doing this, the dress can adjust to fit on many different doll sizes with & without the velcro attached.

Here are a few photos of how the back & front of the dress looks on a few different dolls:


Photo of Evie's actual Cotillion dress in Descendants 2


Mainly using blue craft felt to make the dress. I'm planning to try to paint on tons of little decals soon to make the dress look more similar Evie's dress.

Well, I hope you like it so far!